Developer manual
Configuration of development environment
To be completed
Specific fields
How to create specific fields
When a new form field is needed to be included in a user task, and it is not available. You, as a developer, need to follow these steps in order to create it:
- Create the specific classes for this field.
- Include the classes in the Spring configuration to be injected automatically when the WFE generate the form on the fly.
- Include the attributes of the beans into the Spring configuration to be recognized by the renderer.
- Add the new type field in the BPMN editor.
- Include the specific styles in the css file.
- Create simple workflow to see the new field
The following sections describe these steps through the message text field example, which shows a non modifiable message box for the user.
Create the specific classes for this field
- Create the custom component to be included in the custom field. You can include here what you consider, since it will be rendered on the fly in the associated user task.
	package net.atos.yourbpm.form;
	import com.vaadin.ui.*;
	public class MessageTextCustomComponent extends CustomComponent {
		private static final long serialVersionUID = 1L;
		private Label message;
		private Label label;

	    MessageTextCustomComponent() {
	    	messageTextCustomComponentBuild("Message", "");
	    }

	    MessageTextCustomComponent(String vLabel, String vMessage) {
	    	messageTextCustomComponentBuild(vLabel, vMessage);
	    }

	    private void messageTextCustomComponentBuild(String vLabel, String vMessage){
	        VerticalLayout layoutV = new VerticalLayout();
	        layoutV.setStyleName("messageTextField");

	        label = new Label(vLabel);
	        label.setContentMode(Label.CONTENT_XHTML);
	        label.setStyleName("messageTextField_title");
	        message = new Label(vMessage);
	        message.setContentMode(Label.CONTENT_XHTML);
	        message.setStyleName("messageTextField_message");

	        layoutV.addComponent(label);
	        layoutV.addComponent(message);
		setCompositionRoot(layoutV);
	    }
   	    public String getLabel() {
		return (String) label.getValue();
	    }
  	    public void setLabel(String value) {
		label.setValue(value);;
	   }
  	   public String getMessage() {
		return (String) message.getValue();
	   }
           public void setMessage(String vMessage) {
		message.setValue(vMessage);
	   }
	}
NOTE: remember to set the composition of the root through the method "setCompositionRoot(yourComposition)". If you don't do it, you will receive and error indicating that the root is null when the engine is rendering the page in execution time (but for building time is correct).
- Create the custom field to be included into the form associated to the user task.
	package net.atos.yourbpm.form;
	import org.vaadin.addon.customfield.CustomField;
	public class MessageTextField extends CustomField {
		private static final long serialVersionUID = 1L;
		private MessageTextCustomComponent messageTextCustomComponent;

		public MessageTextField() {
			messageTextCustomComponent = new MessageTextCustomComponent();
			setCompositionRoot(messageTextCustomComponent);
		}

		public MessageTextField(String head, String message) {
			messageTextCustomComponent = new MessageTextCustomComponent(head, message);
			setCompositionRoot(messageTextCustomComponent);
		}
		@Override
		public Class<?> getType() {
		       return String.class;
		}
		@Override
		public Object getValue() {
		 	return messageTextCustomComponent.getMessage();
		}
		@Override
		public void setValue(Object value){
		    	messageTextCustomComponent.setMessage((String) value);

		}

		public void setLabel(Object value){
		    	messageTextCustomComponent.setLabel((String) value);
		}

	}
You have to include the MessageTextCustomComponent into your custom field as an attribute of the new field. Remember to include the new custom field to the root as you have done for the custom component (method "setCompositionRoot(messageTextCustomComponent)"). The engine will render all the components and it will need to have the main root (if not, an execution error will appear indicating that the root is null).
You also need to override the abstract methods of the CustomField Class:
-
- public Class<?> getType()
- public Object getValue()
- public void setValue(Object value)
- Create the FormType, which is responsible to convert the value between the new field type and the Model:
package net.atos.yourbpm.form; import org.activiti.engine.form.AbstractFormType; public class MessageTextFormType extends AbstractFormType { private static final long serialVersionUID = 1L; public static final String TYPE_NAME = "messageText"; public String getName() { return TYPE_NAME; } public Object convertFormValueToModelValue(String propertyValue) { return propertyValue; } public String convertModelValueToFormValue(Object modelValue) { if (modelValue == null) { return null; } return modelValue.toString(); } } - Create the property renderer, which is responsible to include the new field into the user task:
	package net.atos.yourbpm.form;
	import org.activiti.engine.form.FormProperty;
	import org.activiti.explorer.ui.form.AbstractFormPropertyRenderer;
	import com.vaadin.ui.Field;
	public class MessageTextPropertyRenderer extends AbstractFormPropertyRenderer {
		private static final long serialVersionUID = 1L;
		public MessageTextPropertyRenderer() {
		    super(MessageTextFormType.class);
		}
		public Field getPropertyField(FormProperty formProperty) {
		    MessageTextField messagetextField = new MessageTextField(formProperty.getName(), formProperty.getValue());
		    return messagetextField;
		}
	}
Include the attributes of the beans into the Spring configuration to be recognized by the renderer.
- Include the new field type into the activiti-custom-context.xml for the bean "processEngineConfiguration"
	  <bean id="processEngineConfiguration" class="org.activiti.spring.SpringProcessEngineConfiguration">
	  	<property name="dataSource" ref="dataSource" />
	  	<property name="transactionManager" ref="transactionManager" />
	  	<property name="databaseSchemaUpdate" value="true" />
	  	<property name="jobExecutorActivate" value="true" />
	    <property name="enableDatabaseEventLogging" value="true" />
	    <property name="customFormTypes">
	      <list>
	        <bean class="org.activiti.explorer.form.UserFormType"/>
	        <bean class="org.activiti.explorer.form.ProcessDefinitionFormType"/>
	        <bean class="org.activiti.explorer.form.MonthFormType"/>
	        <!-- YourBPM -->
	        <bean class="net.atos.yourbpm.form.TextAreaFormType"/>
	        <bean class="net.atos.yourbpm.form.RadioGroupFormType"/>
	        <bean class="net.atos.yourbpm.form.UploadFormType"/>
	        <bean class="net.atos.yourbpm.form.InvoiceItemsFormType"/>
	         <bean class="net.atos.yourbpm.form.MessageTextFormType"/>
	      </list>
	    </property>
	  </bean>
- Include the new renderer into the activiti-ui-context.xml for the bean "formPropertyRendererManager"
	  <!-- Custom form property renderers can be plugged in here -->
	  <bean id="formPropertyRendererManager" class="org.activiti.explorer.ui.form.FormPropertyRendererManager" lazy-init="true">
	    <!-- Default renderer -->
	    <property name="noTypePropertyRenderer">
	      <bean class="org.activiti.explorer.ui.form.StringFormPropertyRenderer" />
	    </property>
	    <!-- Renderers by property type -->
	    <property name="propertyRenderers">
	      <list>
	        <bean class="org.activiti.explorer.ui.form.StringFormPropertyRenderer" />
	        <bean class="org.activiti.explorer.ui.form.EnumFormPropertyRenderer" />
	        <bean class="org.activiti.explorer.ui.form.LongFormPropertyRenderer" />
	        <bean class="org.activiti.explorer.ui.form.DoubleFormPropertyRenderer" />
	        <bean class="org.activiti.explorer.ui.form.DateFormPropertyRenderer" />
	        <bean class="org.activiti.explorer.ui.form.UserFormPropertyRenderer" />
	        <bean class="org.activiti.explorer.ui.form.BooleanFormPropertyRenderer" />
	        <bean class="org.activiti.explorer.ui.form.ProcessDefinitionFormPropertyRenderer" />
	        <bean class="org.activiti.explorer.ui.form.MonthFormPropertyRenderer" />
	        <!--YourBPM-->
	        <bean class="net.atos.yourbpm.form.TextAreaFormPropertyRenderer" />
	        <bean class="net.atos.yourbpm.form.RadioGroupPropertyRenderer" />
	        <bean class="net.atos.yourbpm.form.UploadPropertyRenderer" />
	        <bean class="net.atos.yourbpm.form.InvoiceItemsPropertyRenderer" />
	        <bean class="net.atos.yourbpm.form.MessageTextPropertyRenderer" />
	       </list>
	    </property>
	  </bean>
NOTE: If you are using the activiti rest module, it is necessary to add the field type in the activiti-custom-context.xml, since the engine parsers all possible attributes of the BPMN 2.0 file, so although it is not responsible to render the graphical user interface, we need to declare it in order to allow to deploy the BPMN 2.0 files that include the new field type.
Add the new type field in the BPMN editor.
Now, you can used it in your BPMN2.0 files that you want to deploy. However we can include this new field in the user task during the design phase in order to simplify the creation of the new forms. Add the name "messageText" that you have associated in the Class MessageTextFormType --> "public static final String TYPE_NAME = "messageText";""
Add this "messageText" name into the html file --> /activiti-webapp-explorer2/src/main/webapp/editor-app/configuration/properties/form-properties-popup.html
        <div class="form-group">
            <label for="typeField">{{'PROPERTY.FORMPROPERTIES.TYPE' | translate}}</label>
            <select id="typeField" class="form-control" ng-model="selectedProperties[0].type" ng-change="propertyTypeChanged()">
                    <option>string</option>
                    <option>long</option>
                    <option>boolean</option>
                    <option>date</option>
                    <option>enum</option>
                    <!-YourBPM ->
                    <option>textArea</option>
                    <option>upload</option>
                    <option>radioGroup</option>
                    <option>invoiceItems</option>
                    <option>messageText</option>
              </select>
         </div>
Include the specific styles in the css file.
Although the Vaadin framework abstract the GUI layer (html, javacript...), it is recommended not to include the styles into the own java classes for the different graphical user interface representation. Hence, in order to decouple the layers, you can associate different styles that you will be able to modify directly through the css file. For example, we have associated different styles for the message box:
- Box of the message --> messageTextField
- Title of the message --> messageTextField_title
- Body of the message --> messageTextField_message
You only need to include in the style.css file (/activiti-webapp-explorer2/src/main/webapp/VAADIN/themes/activiti/styles.css) the styles that you want to applied for your application.
		.messageTextField {
		    background-image: none;
		    height: auto;
		    width: 100%;
		    background-color: #cae2f5;
		    padding-top: 5px;
		    padding-left: 10px;
		}
		.messageTextField_title {
		    font-family: 'Open Sans Condensed', sans-serif;
		    font-size: 15px;
		    color: #333;
		    font-weight: bold;
		}

		.messageTextField_message {
		    color: #333;
		    font-family: 'Muli', sans-serif;
		    margin-bottom: 12px;
		}
Create simple workflow to see the new field
Enter in the design editor and create a simple workflow like this one:
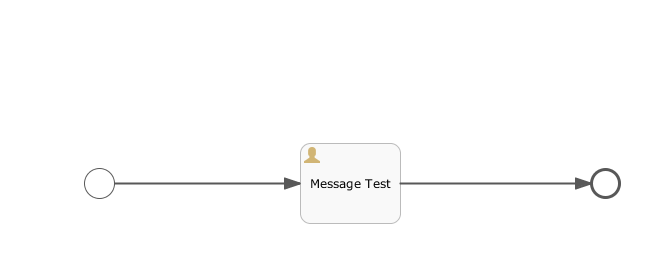
Figure: simple workflow to test the specific field.
You can associate a field with the new type
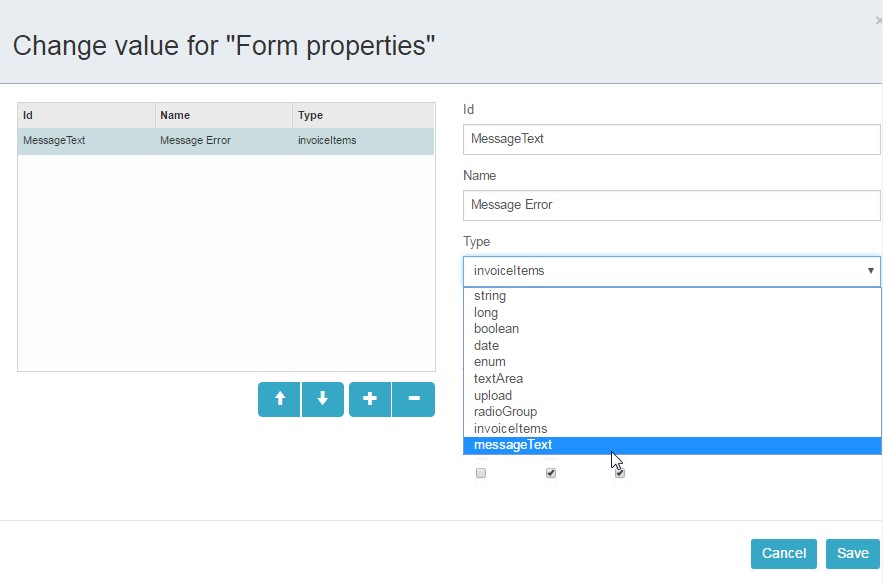
Figure: assign the new field in the user task.
You will obtain the BPMN2.0 in order to deploy it:
	<?xml version='1.0' encoding='UTF-8'?>
	<definitions xmlns="http://www.omg.org/spec/BPMN/20100524/MODEL" xmlns:xsi="http://www.w3.org/2001/XMLSchema-instance" xmlns:xsd="http://www.w3.org/2001/XMLSchema" xmlns:activiti="http://activiti.org/bpmn" xmlns:bpmndi="http://www.omg.org/spec/BPMN/20100524/DI" xmlns:omgdc="http://www.omg.org/spec/DD/20100524/DC" xmlns:omgdi="http://www.omg.org/spec/DD/20100524/DI" typeLanguage="http://www.w3.org/2001/XMLSchema" expressionLanguage="http://www.w3.org/1999/XPath" targetNamespace="http://www.activiti.org/processdef">
	  <process id="Message_test" name="Message test" isExecutable="true">
	    <startEvent id="sid-CD793B83-B45D-45D2-81C4-B4A9D85FE77B"/>
	    <userTask id="sid-3BC1FF99-E940-461F-8775-6DD41A21CDD6" name="Message Test" activiti:assignee="kermit">
	      <extensionElements>
	        <activiti:formProperty id="messageError" name="Error Message" type="messageText" expression="The invoiceNinja service is not available" writable="false"/>
	      </extensionElements>
	    </userTask>
	    <endEvent id="sid-A8AFB2A7-F8E5-449B-BDF8-22819398C337"/>
	    <sequenceFlow id="sid-887B7D01-CB82-4596-8AAA-AEB247003E33" sourceRef="sid-CD793B83-B45D-45D2-81C4-B4A9D85FE77B" targetRef="sid-3BC1FF99-E940-461F-8775-6DD41A21CDD6"/>
	    <sequenceFlow id="sid-2AF8F91C-C21C-46B5-BA5E-8AEB3D1CCFF3" sourceRef="sid-3BC1FF99-E940-461F-8775-6DD41A21CDD6" targetRef="sid-A8AFB2A7-F8E5-449B-BDF8-22819398C337"/>
	  </process>
	  <bpmndi:BPMNDiagram id="BPMNDiagram_test_para_Borrar">
	    <bpmndi:BPMNPlane bpmnElement="test_para_Borrar" id="BPMNPlane_test_para_Borrar">
	      <bpmndi:BPMNShape bpmnElement="sid-CD793B83-B45D-45D2-81C4-B4A9D85FE77B" id="BPMNShape_sid-CD793B83-B45D-45D2-81C4-B4A9D85FE77B">
	        <omgdc:Bounds height="30.0" width="30.0" x="84.99998474121094" y="167.99999237060547"/>
	      </bpmndi:BPMNShape>
	      <bpmndi:BPMNShape bpmnElement="sid-3BC1FF99-E940-461F-8775-6DD41A21CDD6" id="BPMNShape_sid-3BC1FF99-E940-461F-8775-6DD41A21CDD6">
	        <omgdc:Bounds height="80.0" width="100.0" x="300.0" y="142.99999237060547"/>
	      </bpmndi:BPMNShape>
	      <bpmndi:BPMNShape bpmnElement="sid-A8AFB2A7-F8E5-449B-BDF8-22819398C337" id="BPMNShape_sid-A8AFB2A7-F8E5-449B-BDF8-22819398C337">
	        <omgdc:Bounds height="28.0" width="28.0" x="590.9999847412109" y="168.99999237060547"/>
	      </bpmndi:BPMNShape>
	      <bpmndi:BPMNEdge bpmnElement="sid-2AF8F91C-C21C-46B5-BA5E-8AEB3D1CCFF3" id="BPMNEdge_sid-2AF8F91C-C21C-46B5-BA5E-8AEB3D1CCFF3">
	        <omgdi:waypoint x="400.0" y="182.99999237060547"/>
	        <omgdi:waypoint x="590.9999847412109" y="182.99999237060547"/>
	      </bpmndi:BPMNEdge>
	      <bpmndi:BPMNEdge bpmnElement="sid-887B7D01-CB82-4596-8AAA-AEB247003E33" id="BPMNEdge_sid-887B7D01-CB82-4596-8AAA-AEB247003E33">
	        <omgdi:waypoint x="114.99998474121094" y="182.99999237060547"/>
	        <omgdi:waypoint x="300.0" y="182.99999237060547"/>
	      </bpmndi:BPMNEdge>
	    </bpmndi:BPMNPlane>
	  </bpmndi:BPMNDiagram>
	</definitions>
When you execute this workflow, the result will be a message where the Name is the Title and the value of the message can be assigned directly as a String or through a variable. It is not the objective of this section detailing how to use variables, hence the example use directly the expression string in the form.
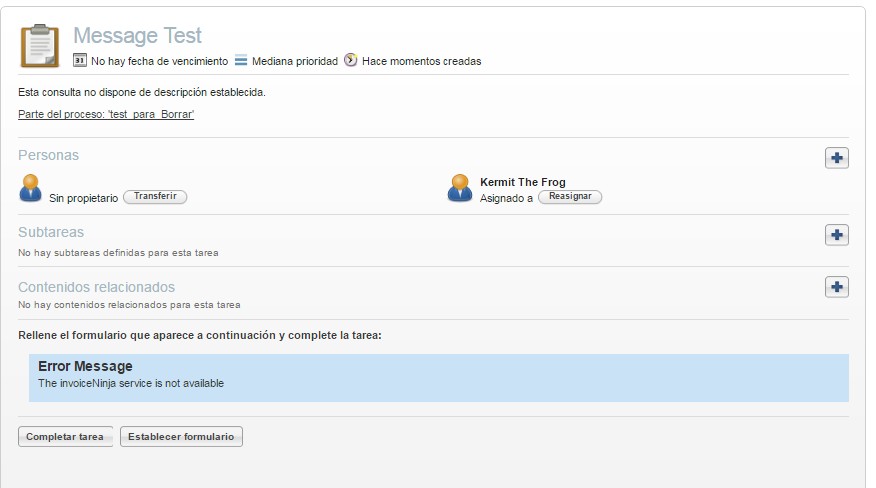
Figure: Final result for the specific field.
How to introduce and modify basic fields
If you want to change the behaviour of an existing field cover by Vaadin, you don't need to create the custom field and component, since the field exists. Hence, you only need to jumps these steps, the rest of the steps are the same. For example you can review the TextArea and the RadioGroup fields included in the atos-form artifact.
Type of fields
The basic fields are included with the validations:
- String Input
- Numeric Input
- Date Input
- List of values
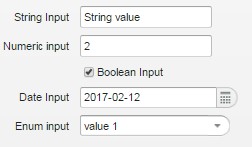
Figure: list of basic fields
YourBPM includes also the following fields to be included in the user tasks. All of these types are built following the previous steps (you can see them in the 'atos-forms' artifact):
- Text area
Include the attribute <textarea> in the user task of your BPMN file. The following text area will appear in the form of your user task:

Figure: text area field
- Upload file
Include the attribute <upload> in the user task of your BPMN file. The following upload component will appear in the form of your user task:
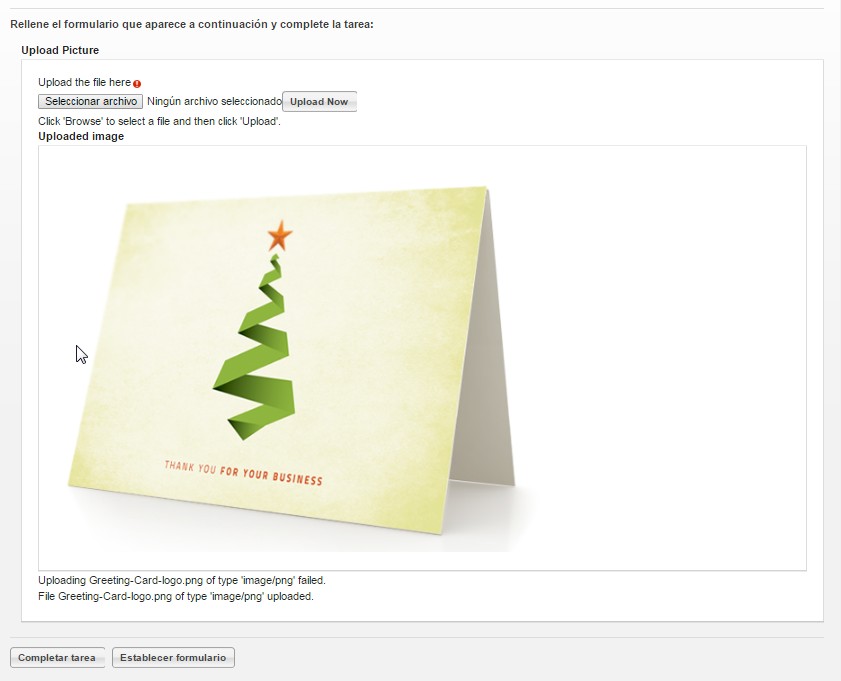
Figure: upload image field
- RadioGroup
Include the attribute <radiogroup> in the user task of your BPMN file. The following radio-group component will appear in the form of your user task:

Figure: radio-group field
The input is managed through a json message, for example
	{
		"1":"Value 1",
		"2":"Value 2"
	}
The result will be the selected row in the radio group.
- Invoice Input
Include the attribute <invoiceItems> in the user task of your BPMN file. The following radio-group component will appear in the form of your user task:
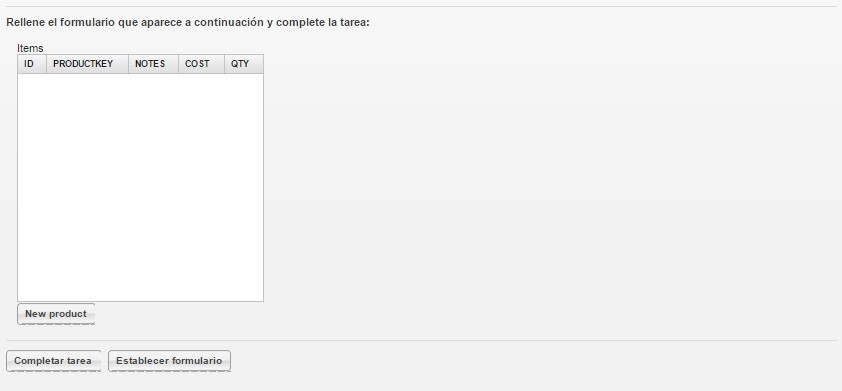
Figure: empty list of invoices
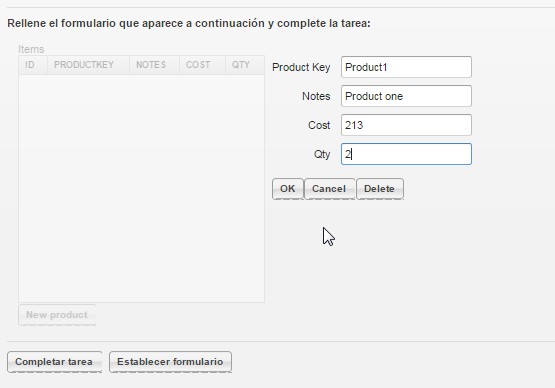
Figure: fill the invoice fields
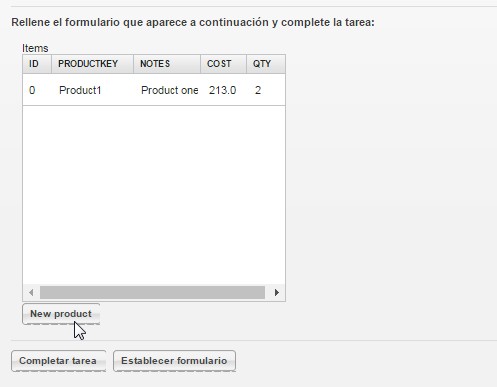
Figure: inclusion of the new invoice row into the list
To populate the field you only need to create a json message, for example:
	[
		{
			"id":0,
			"notes":"Product one",
			"cost":213.0,
			"qty":2,"product_key":"Product1"
		},
		{
			"id":0,
			"notes":"Product two",
			"cost":234.0,
			"qty":4,
			"product_key":"Product 2"
		}
	]
You can modify all the rows what you want and the result will be a json message with your updating data.


